
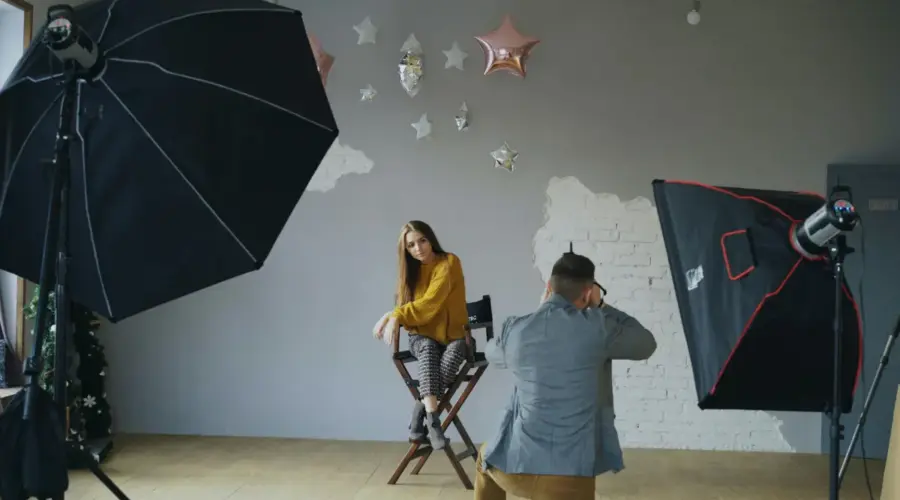
Best Self-Tape Lighting for Actor: How to Get Professional Results
A poorly lit self-tape can make a strong performance harder to judge. Shadows can hide facial expressions, a bright window behind you can leave your face dark, and mixed-colored bulbs can make your skin look unnatural on camera. The good news is that you do not need a film-production lighting package to fix these problems. For most actors, the best lighting for self-tapes is soft, even, and controlled, with a diffused key light placed slightly above eye level and just off to one side of the camera. A reflector or softer fill can balance shadows, while a subtle background or edge light can add separation when needed.
What Should Self-Tape Lighting Actually Achieve?
Self-tape lighting has one main job: make it easy for casting professionals to see the actor clearly without drawing attention to the lighting itself. Your face, eyes, expressions, and skin tone should remain visible throughout the recording. The lighting should support the audition rather than make the tape look like a music video or a dramatic film scene.
Good lighting also needs to remain consistent. If your face becomes bright when you turn one way and dark when you turn the other, the casting team has to work harder to see your performance. The same applies to distracting reflections, strong shadows, changing daylight, or a background that is brighter than your face. A professional-looking self-tape is usually simple: clear facial detail, soft shadows, natural color, and a clean background.
Keep the Actor’s Face Clearly Visible
The camera needs enough light to capture facial expressions and eye detail without washing out the skin. Your face should be the main visual point in the frame, so check the exposure on your face rather than judging the setup by how bright the room looks. A common mistake is adding more light simply because the room feels dark. More light is not always better. If the source is too powerful or too close, highlights can become harsh, and skin can lose natural detail. Start with a soft source, adjust its distance and brightness, and check the actual recording before making further changes.
Shape the Face Without Creating Harsh Shadows
Completely flat front lighting can obscure facial features, while a small hard light placed too far to one side can cast heavy shadows. A large diffused source gives you a better middle ground. It can create gentle shading across the face while keeping both eyes and facial features easy to see. This is one reason softboxes and diffused LED panels are useful for self-tapes. Their larger light-emitting area produces softer transitions than those of a bare bulb or a small, undiffused LED.
Keep Skin Tones Natural
Skin should look like skin, not noticeably yellow, blue, green, or washed out. One of the easiest ways to avoid strange colors is to keep your lighting consistent. If you use several lights, try to match their color temperature rather than combining a warm household bulb with a cool daylight LED. Your camera can also change how the light appears. Always record a short test with the same phone or camera you will use for the audition. A setup that looks good to your eyes may need a small adjustment once it is recorded.
Keep Attention on the Performance
Self-tape lighting should be visually quiet. Colored LEDs, dramatic rim lights, strong shadows, bright background effects, and visible lighting equipment can distract from the actor. The goal is a clean image that makes the casting team focus on your performance. If someone notices the lighting before they notice your acting, the setup is probably doing too much.
The Best Self-Tape Lighting Setup for Most Actors
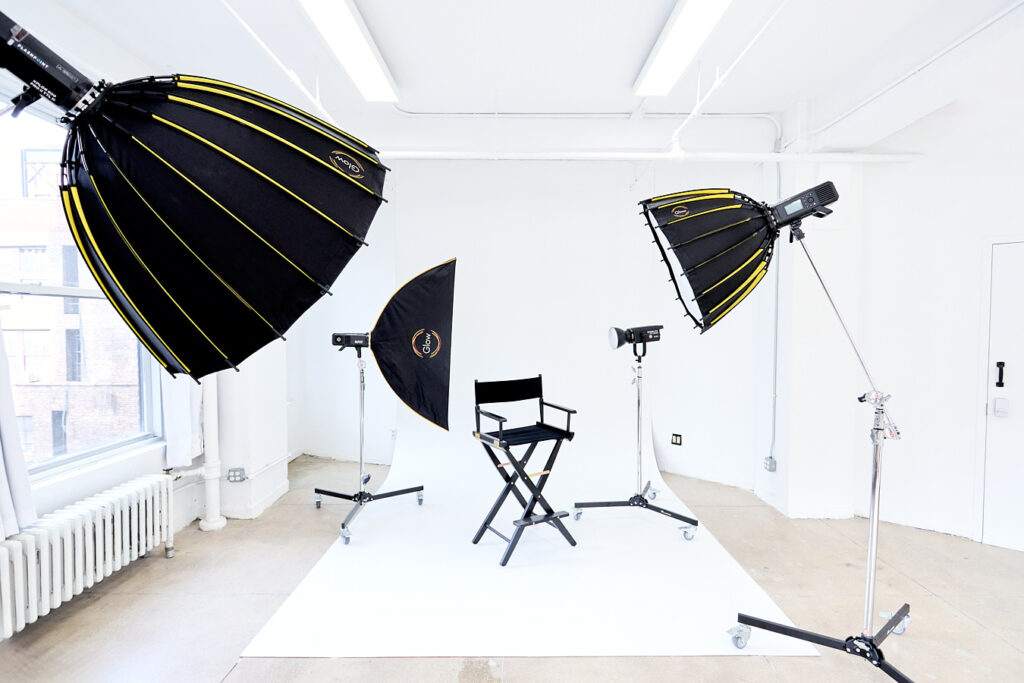
For most actors, a simple setup built around one large, soft key light is enough. Place the key roughly 30–45 degrees to one side of the camera and slightly above eye level. This gives the face some natural shape while keeping the main features clearly illuminated. From there, add a reflector or softer fill only if the shadow side becomes too dark. A background or edge light is optional and should be used only when it solves a specific problem, such as helping the actor separate from a dark or similarly colored backdrop.
Start With the Key Light
The key light is the main light source on your face. A softbox, diffused LED panel, or another large soft source is a strong choice because it spreads light over a larger area and produces softer shadows. Position it slightly to one side of the camera rather than directly behind the lens. Around a 30–45-degree angle is a useful starting point, with the light slightly above eye level and angled down toward you. You can then adjust the distance and brightness until your face looks evenly exposed.
If the light is too far to the side, one half of your face may become unnecessarily dark. If it is directly above you, it can create shadows under your eyes and chin. Small changes in height and angle can make a noticeable difference.
Use Fill Only When the Shadow Side Needs It
Fill light controls the darker side of the face created by the key. It does not need to be another expensive lamp. A second soft light can work, but a white reflector or large piece of white foam board can also bounce some of the key light back toward the shadow side. Keep the fill softer than the main source. If both sides of the face receive exactly the same strong light, you may lose the natural shape created by the key. The purpose of fill is to make shadows readable, not eliminate every shadow.
Add Background or Edge Light for Separation
A background light points at the backdrop rather than the actor. It can add a small amount of brightness or depth behind you, but it should remain subtle. If the background becomes brighter than your face, it can pull attention away from the performance. An edge or back light serves a different purpose. Positioned behind the actor, it can create a gentle highlight around the shoulder or hair and help separate the actor from the background. This is optional for most auditions and should never look like a bright halo.
What a Good Final Setup Should Look Like
Look at the recording rather than judging the equipment itself. A successful setup should give you a clearly visible face, natural skin color, readable eyes, soft shadows, and a simple background. There should be no obvious hotspot on your forehead, no deep shadow hiding one eye, and no distracting reflection from the lighting. If you can see all of those things without thinking about the lights, your setup is doing its job.
Three-Point Lighting for Self-Tapes: When You Need It and When You Don’t
Three-point lighting uses a key light, fill light, and back or edge light. It is a well-known lighting method in photography and video production, but actors do not automatically need all three lights for every audition. A single well-positioned soft key can produce a better self-tape than three poorly positioned lights. The advantage of understanding three-point lighting is that you can add control when your space requires it. Instead of buying three lights immediately, start with the key and add another source only when you can identify a problem that it solves.
Key Light
The key is the primary source that illuminates and shapes the face. For a self-tape, a softbox or diffused LED placed slightly above and to one side of the camera is a reliable starting point. Its job is to establish the main exposure and facial shape. If the key is too hard, the shadows may look severe. If it is too frontal, the face may appear flat.
Fill Light
The fill reduces excessive contrast on the shadow side of the face. It can come from another soft light or a white reflector. A reflector is particularly useful for actors working at home because it takes up little space and does not require another power source. Move it closer when you need more fill, and farther away when the face starts to look too flat.
Back or Edge Light
The back or edge light is positioned behind the actor, providing separation from the background. It can be useful when the actor’s hair, clothing, or shoulders blend into the backdrop. For a normal audition, keep it subtle. The audience should see the actor rather than notice a lighting effect.
Is Three-Point Lighting Necessary for an Audition?
No. Three-point lighting is a useful system, not a requirement. If a single diffused key gives you clear facial detail and a natural background, there is no reason to add extra lights simply to make the setup more elaborate. Start with the simplest arrangement that produces a clean image. Add fill or background separation only when the recording shows that you need it.
Choosing the Right Light for Your Self-Tape
The best lighting equipment depends on your space, budget, and how often you record auditions. A large softbox can produce excellent facial lighting but needs more room than a compact LED panel. A bi-color LED can be easier to adjust when your room changes throughout the day. The important thing is to choose equipment that gives you control over softness, brightness, and color rather than buying the largest or most expensive light available.
Softbox Lights
Softboxes are a strong choice for actors who record self-tapes regularly. The large front surface spreads the light and creates softer shadows across the face. A larger softbox placed at a suitable distance can provide flattering facial illumination without forcing you to sit directly in front of a small, harsh light source. It is especially useful when you have a dedicated corner or room for your self-tape setup.
Bi-Color LED Panels
Bi-color LED panels allow you to adjust both brightness and color temperature. This is useful when you record at different times of day or in rooms with different existing light. They are also easier to fit into smaller spaces than some larger softbox arrangements. For actors who need a flexible setup, an adjustable LED panel with good color rendering and diffusion can be a practical choice.
Diffusion Panels and Modifiers
Diffusion softens a hard source by spreading the light before it reaches the subject. Softbox fabric, dedicated diffusion material, and compatible light modifiers can all help produce a smoother result. Avoid bare bulbs and harsh, undiffused LEDs pointed directly at your face. They can create hard shadows and bright hotspots that are difficult to control.
Reflectors and Bounce Boards
A white reflector can fill shadows without adding another powered light. You can use a photography reflector or a clean white foam board placed on the darker side of your face. The closer the reflector is to you, the more noticeable the bounce becomes. Move it until the shadow side is readable without making both sides of your face equally bright.
Do You Need a Specific Brand or Wattage?
No single brand, wattage, or model is automatically the best choice for every actor. Light size, diffusion, brightness control, color accuracy, and your room’s size matter more than simply choosing a higher wattage. If you are buying equipment, prioritize a source that can be positioned easily, produces consistent color, and gives you enough control to create soft facial lighting.
Ring Light vs. Softbox for Actor Self-Tapes
Ring lights are convenient, especially in small rooms, but they are not the only option. A large diffused softbox generally gives you more directional control and can create more natural facial shaping. A ring light can still work well when space, budget, or portability is the main concern. The right choice depends on the final image rather than the name of the equipment.
When a Softbox Is the Better Choice
A softbox is usually the stronger option when you have enough space for a light stand and want more control over facial dimension. Because the source can be placed to one side of the camera, it can create gentle modeling instead of lighting the face completely flat from the lens position. It is also useful when you want to keep the light source larger and farther from your face while maintaining soft illumination.
When a Ring Light Makes Sense
A ring light can be useful for beginners, actors with limited space, or anyone who needs a simple setup that can be packed away quickly. Many models allow brightness and color adjustments, which makes them more flexible than a basic household lamp.The important point is to check the recorded image. If the light gives you clear eyes, natural skin, controlled exposure, and no distracting reflection, it may be perfectly suitable for your situation.
What to Watch for With Ring Lights
Ring lights can produce a recognizable circular catchlight in the eyes. Some actors may also find that the front-facing light reduces facial dimension compared with a larger directional source. They can also reflect strongly in glasses. If you wear glasses, check the recording from your normal audition position and adjust the light angle if necessary.
The Practical Verdict
If you have room for a larger diffused source, a softbox or diffused LED is generally the more flexible choice for actor self-tapes. If you have limited space or need a quick setup, a quality ring light can still deliver clean results. Do not reject a lighting setup solely because of the type of light. Judge the actual recording.
How to Use Natural Light for a Self-Tape
Natural window light can produce excellent results without purchasing any equipment. The simplest arrangement is to face a window so that daylight falls onto your face while the camera sits between you and the window. The main challenge is consistency. Sunlight changes throughout the day, clouds can alter brightness within minutes, and a setup that works in the afternoon may look completely different at night.
Face the Window Instead of Putting It Behind You
If the brightest window is behind you, your camera may expose for the window and leave your face too dark. Turning around and facing the window puts the main source where you need it. Side lighting can also work, but it may create stronger contrast across the face. Start with the window more directly in front of you and adjust your position based on the recorded image.
Soften Direct Sunlight
Direct sunlight can create hard shadows and bright patches across the face. If the window receives strong sun, a sheer curtain can help spread the light. Avoid placing your face directly in a narrow beam of sunlight. Soft, indirect daylight is usually easier to control.
Control the Rest of the Room
Turn off unnecessary lamps if they introduce a different color temperature. Check for bright windows, mirrors, screens, or lamps in the background that could pull attention away from you. The simpler the room is, the easier it is to control the final image.
The Biggest Problem With Window Light
Consistency is the main weakness. If you record several auditions at different times, the color and brightness can change significantly. Artificial lighting is useful when you need the same setup repeatedly. Once you find a lighting arrangement that works, you can reproduce it regardless of the time of day.
Get the Color Temperature Right Before You Record
Color temperature describes the appearance of light, from warmer yellow tones to cooler blue tones. For self-tapes, the exact number is less important than keeping your sources consistent. If one side of the face is lit by a warm household bulb while the other is lit by cool daylight, the skin can appear different across the frame. This is especially noticeable when the camera automatically adjusts exposure or white balance.
Color temperature is measured in Kelvin. Lower values generally appear warmer, while higher values appear cooler. You do not need to become a lighting technician to use this information. The practical rule is simple: match your lights as closely as possible and check how the result looks on the camera.
Your eyes adapt quickly to different lighting conditions. Your camera does not always interpret the room in the same way. Record a short clip, look at your skin tone and background, and make adjustments before starting the actual audition.
How to Light Different Self-Tape Situations
The best setup can change depending on the room and recording conditions. Rather than rebuilding your entire lighting system for every audition, keep the same basic key-light position and make small adjustments based on the situation.
Daytime Self-Tape Near a Window
Use the window as a soft front source if the daylight is even. Turn off competing lights when they create a noticeable color difference. If clouds or sunlight cause the exposure to change, close the curtains and use a controlled artificial light instead.
Nighttime Self-Tape
At night, artificial lighting gives you much more control. A diffused LED or softbox can become your key, with a reflector filling the shadow side if necessary. Avoid relying on a ceiling light as your main source, as it can cast shadows under the eyes and chin.
Self-Tape in a Dark Room
You do not need to light the entire room. Concentrate on the actor and keep the background simple. A soft key can illuminate the face while the rest of the room remains slightly darker. Just make sure the background does not become so dark that the actor’s clothing and hair disappear into it.
Self-Tape With Glasses
Glasses can reflect softboxes, LED panels, and ring lights. If you see a bright reflection across the lenses, move the light slightly higher or farther to the side. Do not keep changing your head position to avoid the reflection if it affects your performance. Adjust the light instead.
Self-Tape With Limited Floor Space
Use a compact LED panel, small softbox, or ring light if it produces a clean image. A white reflector can provide fill without requiring another stand. The goal is to use the smallest setup that still gives you controlled light.
Self-Tape Requiring More Full-Body Movement
If the audition requires you to stand, walk, or move significantly, test the entire movement area before recording. A beautifully lit face is useless if the actor walks into darkness halfway through the scene. Move the light farther away or use a larger source when necessary to create a broader area of usable illumination.
Common Self-Tape Lighting Problems and How to Fix Them
Most lighting tips can be applied quickly by looking at a short test recording. Instead of immediately buying new equipment, first adjust the position, height, distance, or intensity of the existing light.
| Problem | Likely Cause | Fix |
| Face looks too dark | Key is too weak or poorly positioned | Move the key closer or increase its output |
| Harsh shadows | Small or undiffused source | Add diffusion or use a larger source |
| Face looks flat | Too much frontal fill | Reduce fill or move the key slightly off-axis |
| Eyes look dark | Light is too high or poorly positioned | Lower or reposition the key |
| Glasses reflect the light | Source is aligned with the lenses | Move the light higher or farther to the side |
| Face looks yellow or blue | Mixed color temperatures | Match the light sources |
| Actor blends into the wall | Too little background separation | Move away from the wall or add subtle edge light |
| Background is distracting | Too bright or cluttered | Simplify the background and reduce its exposure |
| Skin looks washed out | Excessive exposure | Lower the light intensity |
| Lighting changes during the take | Changing daylight | Close the curtains or use controlled artificial light |
When a Professional Self-Tape Studio Is Worth It
A home setup can work very well, but some actors reach a point where controlling the room becomes more difficult than focusing on the audition. Limited floor space, changing daylight, background distractions, poor sound conditions, or the need for consistent lighting can make studio rental a practical choice.
A professional space such as Love Studios NYC can be particularly useful when you need a controlled environment without turning your apartment into a permanent production setup. A studio gives you more room to properly position lighting, camera equipment, and the actor, which can be valuable for important auditions, portfolio work, and other recorded performances.
Final Answer: What Is the Best Self-Tape Lighting Setup?
For most actors, the best self-tape lighting setup is simple: use a large diffused key light slightly above eye level and just to one side of the camera, then add a reflector or soft fill if the shadow side needs help. Keep the color consistent, avoid harsh overhead lighting, control reflections in glasses, and use a neutral background that does not compete with your face.
You do not need three lights, expensive equipment, or a cinematic lighting style just to make an audition look professional. If a window gives you soft, consistent light, use it. If you record regularly, a diffused LED or softbox gives you more control. If your room is too small or inconsistent, a professional studio can provide the space and lighting control you cannot easily create at home. The best setup is the one that lets casting clearly see you, your eyes, and your performance without noticing the lighting itself.