Photography Lighting Tips: Master Light in 2026
Photography Lighting Tips can help you control mood, depth, texture, and attention in every image. Lighting plays a central role in photography, and without proper lighting, even the best camera can’t save a poorly lit photo. Without proper lighting, even the best camera can’t save a poorly lit photo. Whether you’re just starting with photography lighting basics or improving your studio work at Love Studios NYC, photography tips can help you build stronger skills alongside your lighting practice. We will share practical lighting tips for photography, useful techniques for beginners, and proven ways to get good lighting for pictures and photos, updated for 2026.
Why Lighting Matters in Photography
Light defines the structure and emotion of a photograph. It influences everything, from exposure and contrast to the colors and shadows in your image. For example, soft light can make portraits appear warm and flattering, while harsh light can create drama and tension. Photography is essentially the capture of light, so its role is foundational.
At Love Studios NYC, we teach our clients and partners that controlling light is the first step toward consistent, high-quality photos. Poor lighting often leads to noisy shadows, lost detail, or a flat image with no depth. This applies whether you’re using a smartphone or DSLR. Understanding lighting isn’t optional; it’s the first skill every photographer should master.
Photography Lighting Techniques: Understand Light Direction & Path
Light travels in a straight line until it is reflected, scattered, or otherwise redirected. Where the light comes from determines where shadows and highlights appear on your subject.
The four basic directions are:
- Front lighting: Light comes from near the camera. It produces even illumination and reduces visible shadows, but can make portraits look flatter.
- Side lighting: Light comes from the side of the subject. It reveals texture, creates depth, and can produce dramatic contrast.
- Backlighting: Light comes from behind the subject. It can create silhouettes, glowing edges, and strong subject separation.
- Top lighting: Light comes from above. It can create strong shadows under the eyes, nose, and chin, so it often needs careful positioning or fill light.
For portraits, placing the key light around 45 degrees from the subject is a useful starting point. You can then raise, lower, or move the light sideways to change the pattern of shadows across the face. Even a small change in the position of a light or subject can alter the photograph significantly. If a window is directly in front of your subject, the result may look bright and even. Move the subject so the window is to the side, and you introduce shape and depth.
Side Lighting Photography: Create Texture and Depth
Side lighting is especially useful when you want texture to stand out. The light skims across the subject’s surface, creating areas of brightness and shadow.
Try side lighting for:
- Portraits with more facial definition
- Clothing and fabric
- Food photography
- Architecture
- Jewelry and products
- Textured backgrounds
For a softer result, increase the apparent size of the light source or add diffusion.
Learn the Inverse Square Law
The inverse square law states that as the distance between the light source and the subject doubles, the light’s intensity reduces by four times. It’s a simple physics principle, but crucial in photography. Moving a light source closer brightens the subject significantly and increases contrast with the background. Moving it further flattens the light and reduces intensity.
| Distance from Light | Relative Intensity |
| 1 ft | 100% |
| 2 ft | 25% |
| 3 ft | 11% |
| 4 ft | 6.25% |
This knowledge helps avoid overexposure or underexposure. In product photography, for instance, moving your light just a foot closer creates punchier shadows and more defined edges, a common technique at Love Studios NYC for commercial work.
Another important point: light distance affects falloff. A light placed close to the subject can create a noticeable brightness difference between the subject and background. Moving the light farther away can make illumination more even across subjects at different distances. The inverse square law doesn’t mean every photograph should use the light as close as possible. Your choice depends on the source size, desired softness, background brightness, and overall look.
Choose the Right Light Source
Every photographer should learn the differences between natural and artificial light. Light sources fall into two broad categories: natural and artificial. Natural light includes sunlight, window light, shade, and overcast skies. Artificial light includes strobes, speedlights, LEDs, and other continuous lighting systems. The best lighting for pictures depends on what you are photographing and how much control you need.
| Light Source | Best For | Main Advantage |
| Window light | Portraits, lifestyle | Soft and natural |
| Direct sunlight | Outdoor portraits, architecture | Strong contrast |
| Overcast light | Portraits, outdoor products | Even illumination |
| LED/continuous light | Video, portraits, product work | Easy to preview |
| Speedlight | Events, portraits, location work | Portable |
| Studio strobe | Fashion, commercial, product work | High power and control |
Natural Light
Golden hour, shortly after sunrise or before sunset, produces warm, directional light that works well for portraits. For a simple portrait photography setup, place your subject where the light falls naturally across the face and avoid adding unnecessary lights. Window light, open shade, and golden-hour sunlight can all provide attractive results when the light is positioned carefully.
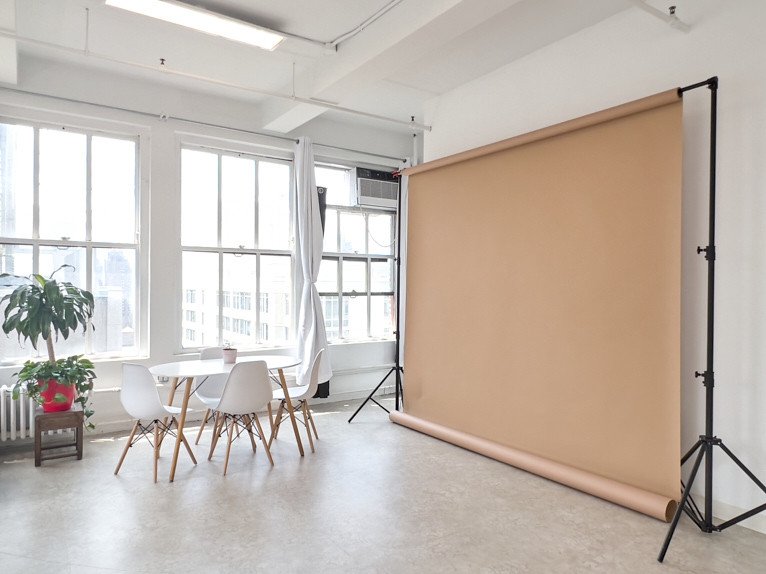
When you are looking for simple lighting and posing tips for portrait photography, start with the light before worrying about complicated posing. Turn the subject slightly toward the light, watch the shadows under the eyes and chin, and make small changes to the head and body position. A simple one-light setup often gives you enough control for a clean portrait.
Artificial Light
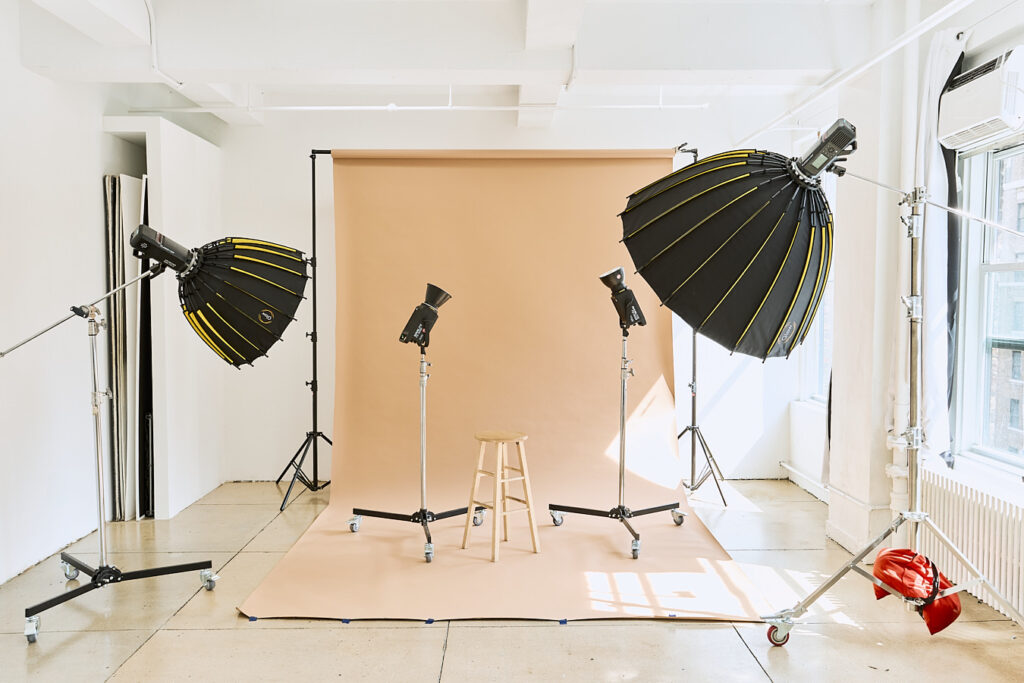
LEDs and continuous lights let you preview your lighting setup before taking the photograph. Strobes provide more power and are widely used for fashion, portrait, product, and commercial photography. Speedlights are useful when portability matters. For photographers learning studio lighting tips, one light with a softbox is often enough to understand direction, softness, shadows, and exposure before moving to a larger setup.
Soften Your Light with Modifiers
Light quality describes how hard or soft the transition between highlights and shadows appears. A small, direct source tends to produce harder light with defined shadows. A larger source placed close to the subject produces softer light with smoother transitions.
Common modifiers include:
- Softbox: Creates soft, controlled, directional light and is widely used for portraits and commercial photography.
- Umbrella: Produces broad light and is quick to set up. Shoot-through and reflective umbrellas create different results.
- Diffuser: Scatters light and reduces harshness, especially when working with direct sunlight or another strong source.
- Reflector: Bounces existing light back toward the subject to reduce shadows.
- Scrim: Places a translucent surface between the light and subject to make a strong source softer.
- Flag: Blocks or controls unwanted light and helps prevent spill.
One of the simplest lighting tips for photography is to change the size of the light source before changing your camera settings. A larger source relative to the subject generally produces softer transitions between highlights and shadows. This is why softboxes, umbrellas, diffusers, and large windows are so useful for portraits.
Softbox vs. Umbrella
A softbox generally provides more control over where the light travels. An umbrella spreads light more broadly and is often quick and simple to use. Choose a softbox when you want directional control and predictable light. Choose an umbrella when you want broad, simple illumination and fast setup.
Control Light Color & Temperature
One of the most important photography lighting basics is understanding color temperature, which is measured in Kelvins (K). Daylight is around 5500K (cool white), while indoor bulbs can range from 2700K to 3200K (warm yellow). If you don’t adjust for this, your photos may have strange color casts.
| Light Source | Approximate Temperature |
| Candlelight | 1900K |
| Tungsten bulb | 2800K |
| Fluorescent light | Around 4000K |
| Daylight | Around 5500K |
| Overcast sky | Around 6500K |
Use white balance settings to match your light source. At Love Studios NYC, we shoot RAW so we can adjust white balance in post without damaging image quality, a best practice for all photographers.
Use Shadows for Depth & Texture
Shadows aren’t flaws, they’re tools. They give your image dimension, shape, and emotion. The key is to use them with intent. For example, in portraiture, shadows under the cheekbones add definition. In food photography, side lighting creates a contrast that highlights texture.
At Love Studios NYC, we often adjust shadows depending on the mood of the shoot. For luxury products, deeper shadows suggest mystery and depth. For bright, friendly portraits, we soften shadows to keep the mood light and open.
Position Lights to Shape Form
Your studio lighting setup controls how the subject appears in 3D space. The classic three-point lighting system includes:
- Key light: Main light source
- Fill light: Softens shadows from the key
- Backlight (rim or hair light): Separates subject from background
Adjusting these lights changes the mood and focus. In our studio sessions, we often use a large soft key light, a reflector as fill, and a subtle backlight for portraits, a formula that delivers clean, professional results.
Try Basic Portrait Lighting Patterns
Once you understand key, fill, and backlight, experiment with common portrait patterns. Loop lighting places the key light slightly to one side and above the subject, creating a small shadow from the nose toward the cheek. Rembrandt lighting produces a small triangle of light beneath the eye on the shadowed side of the face.
Butterfly lighting places the key light in front of and above the subject, producing a butterfly-shaped shadow below the nose. Split lighting places the light roughly to the side, leaving one side of the face brighter and the other in deeper shadow.
These patterns give you practical starting points for portrait light photography. You can then adjust the light position based on the person’s face, expression, clothing, and desired mood.
Balance Flash and Ambient Light
Flash is not just for dark scenes. It’s a tool for filling light and controlling shadows, especially outdoors. The trick is to balance the flash with available (ambient) light so it doesn’t overpower the scene. A common method is fill flash, where a soft flash adds light to a shadowy subject in bright sunlight. Use manual flash power or exposure compensation to fine-tune the balance. This technique is essential in wedding, event, and street photography.
Flash vs. Continuous LED Lighting
Both flash and continuous lighting can produce excellent results, but they work differently. Flash delivers a short burst of light, allowing high output without keeping the light on during the exposure. Continuous LED lighting stays on, making it easier to see shadows, highlights, and catchlights before taking the photograph.
For beginners, continuous lighting can make learning easier because you can see changes immediately. Flash becomes particularly useful when you need more power, faster shutter speeds, or greater control over ambient light. Base your choice on the type of photography you do rather than assuming one system is universally better.
Keep Your Lighting Consistent
Consistent lighting creates a consistent visual style. This is important in commercial, eCommerce, or brand photography. Use light meters, color cards, and lighting diagrams to recreate lighting setups. At Love Studios NYC, we document every shoot’s setup, including power settings, modifiers, and light positions, to replicate looks for returning clients.
How to Get Good Lighting for Pictures
If you are wondering how to get good lighting for pictures, how to get good lighting for photos, or how to find good lighting when taking pictures, start with the light itself before changing lots of camera settings. A simple process makes it easier to see what is improving the image.
What Is the Best Lighting for Photography?
The best lighting for photography depends on the subject and the look you want. Soft window light is a strong choice for portraits, directional side light works well for texture and depth, and controlled studio lighting is useful when you need consistent results. For beginners, a single large soft light or window is often enough to learn the basics before adding more equipment.
1. Identify the main light
Find the strongest or most important light source in the scene. Decide whether you want to use it as your key light or reduce its influence.
2. Look at its direction
Move around the subject and watch how the shadows change. Front, side, and back positions can produce completely different results.
3. Check light quality
Ask whether the source is hard or soft. If the shadows are too harsh, increase the apparent size of the source or add diffusion.
4. Control exposure
Use aperture, shutter speed, and ISO to establish your exposure. With flash, adjust flash power as another way to control illumination.
5. Check highlights and shadows
Look at the brightest and darkest areas of the photograph. Make sure important details are not being lost.
6. Correct color
Check for warm, cool, or mixed color casts. Set an appropriate white balance or adjust your lights so their color temperatures work together.
7. Make one change at a time
Move the light, change the modifier, adjust the power, or alter the camera position one step at a time. This makes it much easier to understand what caused the change.
This simple process is one of the most useful ways to learn photography lighting because it helps you connect each adjustment with a visible result.
Practice & Observe Real-World Light
The best way to learn photography lighting is to observe how light behaves before trying to control it. Watch how light falls on faces, walls, clothing, buildings, and other subjects throughout the day. Take notes. Photograph the same scene at different times. This trains your eye to see nuance in shadows and highlights. We often advise beginner photographers to walk around their neighborhood with a camera and just watch how natural light changes. Treat every situation as a learning opportunity. Over time, this observation sharpens your ability to manipulate light on command.
Common Lighting Mistakes & How to Avoid Them
- Harsh shadows: Caused by small, direct light. Use a diffuser.
- Blown highlights: Avoid overexposing bright areas. Lower flash power.
- Mixed light sources: Can result in odd colors. Stick to one type or adjust the white balance.
- Flat lighting: Add shadows or depth with directional light.
Lighting Gear Checklist for Beginners
| Equipment | Purpose |
| Reflector | Bounce and soften light |
| Softbox | Diffuse harsh light |
| Tripod | Stability in low light |
| Flashgun/Speedlite | Add controlled light |
| LED light panel | Continuous light source |
| Light Stand | Hold the lighting gear |
This studio equipment is affordable, portable, and can elevate a beginner’s photography setup quickly.
When to Use a Photography Studio
A controlled photography studio environment can make learning and professional photography easier because you can control where the light comes from instead of relying on changing weather or available room light.
A studio is especially useful for:
- Fashion photography
- Model portfolios
- Acting headshots
- Product photography
- eCommerce images
- Brand campaigns
- Editorial shoots
- Casting sessions
- Creative portraits
At Love Studios NYC, photographers can work dedicated studio environment while accessing photography services for different types of shoots. This gives you room to test different light positions, modifiers, and setups without relying on unpredictable outdoor conditions.
FAQs: Photography Lighting Tips
What is the best light for portrait photography?
Soft, directional light is a strong starting point for portraits. Window light or a large softbox placed around 45 degrees from the subject can create gentle shadows while maintaining facial definition.
How do I use light in photography?
Start by identifying your main light source, then consider its direction, size, distance, and intensity. Adjust the subject or light position before changing several camera settings at once. This is one of the easiest ways to understand using light in photography.
What is the best lighting for photos?
Soft, controlled light is a strong starting point for many photographs. For portraits, try window light or a large softbox. For products and commercial work, controlled studio lighting can provide consistent results. The best lighting for photos depends on the subject and intended style.
How do I get the best lighting for photos?
Start with the direction of your main light, then check whether the shadows are too hard or too deep. Change the source size, distance, or modifier before adding another light. Check exposure and white balance after making each adjustment.
How do I get good lighting in my room for pictures?
Use a large window as your main light when possible. Turn off competing indoor lights if they create unwanted color casts, position your subject at an angle to the window, and use a white wall or reflector to lift deep shadows. This is a simple indoor photography lighting setup for beginners.
Final Thoughts
Good photography lighting comes from understanding light rather than simply owning more equipment. The strongest photography lighting tips are often simple: control the direction, choose the right light quality, watch your shadows, manage exposure, and keep color consistent. Learn how direction changes shadows, how source size affects softness, how distance changes intensity and falloff, and how color temperature affects the final image.
Start with one light. Experiment with front, side, and backlighting, then practice different photography lighting techniques with natural and artificial light. Once you understand what changes when you move the light, you can build more advanced setups with confidence. Try a reflector before adding another light. Learn how a softbox changes light quality. Practice with natural window light and then recreate similar effects with artificial lighting.
The more you observe and test these principles, the easier it becomes to recognize good lighting and create it intentionally. Whether you are shooting portraits at home, building a portfolio, photographing products, or working on a professional studio production, strong lighting skills can make a bigger difference than simply upgrading your camera.