Photography Lighting Tips: Master Light in 2025
Lighting plays a central role in photography. It shapes mood, defines depth, and highlights your subject. Without proper lighting, even the best camera can’t save a poorly lit photo. Even if you’re just starting or improving your studio work at Love Studios NYC, understanding lighting gives your work a professional edge. This guide shares practical, fact-based lighting tips for beginners and beyond, built on proven rules and updated for 2025.
Why Lighting Matters in Photography
Light defines the structure and emotion of a photograph. It influences everything, from exposure and contrast to the colors and shadows in your image. For example, soft light can make portraits appear warm and flattering, while harsh light can create drama and tension. Photography is essentially the capture of light, so its role is foundational.
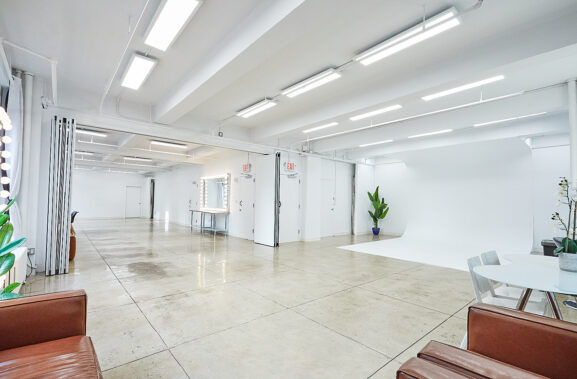
At Love Studios NYC, we teach our clients and partners that controlling light is the first step toward consistent, high-quality photos. Poor lighting often leads to noisy shadows, lost detail, or a flat image with no depth. This applies whether you’re using a smartphone or DSLR. Understanding lighting isn’t optional; it’s the first skill every photographer should master.
Understand Light Direction & Path
Light always travels in a straight line. This seems basic, but understanding it changes how you shoot. The direction from which light hits your subject defines the shadows and highlights in your image. Front lighting minimizes texture but can make subjects appear flat. Side lighting enhances shape and depth. Backlighting creates silhouettes and glowing outlines.
Beginners often overlook how small changes in angle, even moving your light or subject by a few inches, can drastically change the mood of a shot. For example, window light from the side creates a natural gradient of light and shadow, great for portraits. At Love Studios NYC, we often position light at 45-degree angles to sculpt features naturally without harsh shadows.
Learn the Inverse Square Law
The inverse square law states that as the distance between the light source and the subject doubles, the light’s intensity reduces by four times. It’s a simple physics principle, but crucial in photography. Moving a light source closer brightens the subject significantly and increases contrast with the background. Moving it further flattens the light and reduces intensity.
| Distance from Light | Relative Intensity |
| 1 ft | 100% |
| 2 ft | 25% |
| 3 ft | 11% |
| 4 ft | 6.25% |
This knowledge helps avoid overexposure or underexposure. In product photography, for instance, moving your light just a foot closer creates punchier shadows and more defined edges, a common technique at Love Studios NYC for commercial work.
Choose the Right Light Source
Every photographer should learn the differences between natural and artificial light. Natural light, such as sunlight or diffused window light, is free and often flattering. But it changes throughout the day. Artificial light, from strobes, LEDs, or continuous lights, gives you full control.
Natural Light Best Practices
Golden hour (shortly after sunrise or before sunset) offers warm, soft light that flatters skin tones. Midday sun is harsh, so use shade or reflectors. Indoors, windows can act as softboxes. Cloudy skies create diffused light, ideal for even tones.
Artificial Light Options
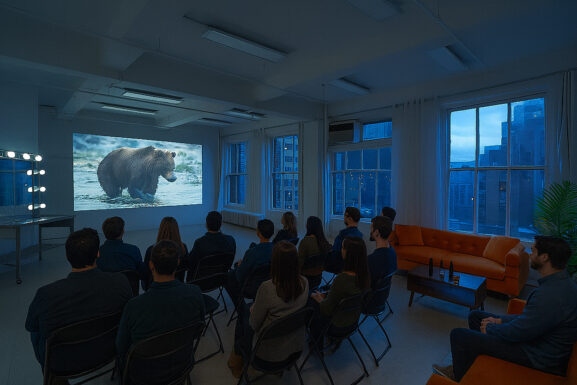
LEDs and continuous lights let you preview your lighting setup. Strobes are more powerful and used in fashion or product photography. Each tool has a role. At Love Studios NYC, we pair strobes with softboxes to shape light while maintaining control.
Soften Your Light with Modifiers
Soft light is generally more flattering, especially for portraits. It reduces harsh shadows and evens skin tone. To achieve this, use light modifiers like softboxes, umbrellas, or diffusers. These tools increase the light source’s size relative to the subject, softening the output.
Modifiers help control both the quality and direction of light. A softbox, for example, creates a rectangular beam that mimics window light. Reflectors bounce light back onto the subject, reducing shadows. We recommend every beginner invest in at least one modifier to elevate photo quality instantly.
Control Light Color & Temperature
Every light source has a color temperature, measured in Kelvins (K). Daylight is around 5500K (cool white), while indoor bulbs can range from 2700K to 3200K (warm yellow). If you don’t adjust for this, your photos may have strange color casts.
| Light Source | Temperature (Kelvin) |
| Candlelight | 1900K |
| Tungsten Bulb | 2800K |
| Fluorescent Light | 4000K |
| Daylight | 5500K |
| Overcast Sky | 6500K |
Use white balance settings to match your light source. At Love Studios NYC, we shoot RAW so we can adjust white balance in post without damaging image quality, a best practice for all photographers.
Use Shadows for Depth & Texture
Shadows aren’t flaws, they’re tools. They give your image dimension, shape, and emotion. The key is to use them with intent. For example, in portraiture, shadows under the cheekbones add definition. In food photography, side lighting creates a contrast that highlights texture.
At Love Studios NYC, we often adjust shadows depending on the mood of the shoot. For luxury products, deeper shadows suggest mystery and depth. For bright, friendly portraits, we soften shadows to keep the mood light and open.
Position Lights to Shape Form
Your lighting setup controls how the subject appears in 3D space. The classic three-point lighting system includes:
- Key light: Main light source
- Fill light: Softens shadows from the key
- Backlight (rim or hair light): Separates subject from background
Adjusting these lights changes the mood and focus. In our studio sessions, we often use a large soft key light, a reflector as fill, and a subtle backlight for portraits, a formula that delivers clean, professional results.
Balance Flash and Ambient Light
Flash is not just for dark scenes. It’s a tool to fill light and control shadows, especially outdoors. The trick is to balance the flash with available (ambient) light so it doesn’t overpower the scene.
A common method is fill flash, where a soft flash adds light to a shadowy subject in bright sunlight. Use manual flash power or exposure compensation to fine-tune the balance. This technique is essential in wedding, event, and street photography.
Keep Your Lighting Consistent
Consistency in lighting leads to a consistent visual style. This is important in commercial, eCommerce, or brand photography. Use light meters, color cards, and lighting diagrams to recreate lighting setups.
At Love Studios NYC, we document every shoot’s setup, including power settings, modifiers, and light positions, to replicate looks for returning clients.
Practice & Observe Real-World Light
Observation is a critical but underrated skill. Watch how light falls on faces, walls, and buildings throughout the day. Take notes. Photograph the same scene at different times. This trains your eye to see nuance in shadows and highlights.
We often advise beginner photographers to walk around their neighborhood with a camera and just watch how natural light changes. Treat every situation as a learning opportunity. Over time, this observation sharpens your ability to manipulate light on command.
Common Lighting Mistakes & How to Avoid Them
- Harsh shadows: Caused by small, direct light. Use a diffuser.
- Blown highlights: Avoid overexposing bright areas. Lower flash power.
- Mixed light sources: Can result in odd colors. Stick to one type or adjust the white balance.
- Flat lighting: Add shadows or depth with directional light.
Lighting Gear Checklist for Beginners
| Equipment | Purpose |
| Reflector | Bounce and soften light |
| Softbox | Diffuse harsh light |
| Tripod | Stability in low light |
| Flashgun/Speedlite | Add controlled light |
| LED light panel | Continuous light source |
| Light Stand | Hold the lighting gear |
This gear is affordable, portable, and can elevate any beginner’s setup quickly.
FAQs – Photography Lighting Tips
Q: What is the best light for portrait photography?
Soft natural light or a softbox/strobe combo placed at 45° to the subject usually gives flattering results.
Q: How do I soften harsh sunlight?
Use a diffuser, shoot in the shade, or bounce light with a reflector.
Q: How far should my light be from the subject?
It depends on the effect. Closer lights are softer but more intense; farther lights are harder and more directional.